Welcome to the first post in a new series focusing on Google Cloud VMware Engine (GCVE)! This first post will walkthrough prerequisites, deploying an SDDC with VMware HCX, and accessing vCenter via VPN Gateway (i.e., OpenVPN).
Before we dive into deploying an SDDC, I want to set expectations for this blog series. My goal when working in the cloud is to create, modify and destroy resources programmatically. My tool of choice is Terraform, but I will also use CLI-based tools like gcloud. Occasionally I will inspect API calls directly and perform API calls with Python or cURL. I have found that learning a product’s API is an excellent way to master it. Cloud consoles (GUIs) are adequate when getting started, but interfacing with the API, whether through Terraform or an SDK, is how these platforms are designed to work.
This first post will be different from the others because the GCVE API documentation is not yet public, nor is there any Terraform functionality available to create or destroy GCVE resources. API documentation and Terraform for GCVE is coming, so when it is available, I will certainly blog about it! For now, I will walk through the GCVE GUI to detail SDDC and VPN gateway creation. Have no fear – there will be plenty of Terraform in future posts.
Other posts in this series:
- Connecting a VPC to GCVE
- Bastion Host Access with IAP
- Network and Connectivity Overview
- HCX Configuration
- Common Networking Scenarios
Prerequisites for Creating a GCVE SDDC
If you’ve read any of my previous blog posts on cloud networking, you will already know that the most important thing to do before deploying anything into the cloud is rigorous planning. Deploying an SDDC in GCVE is no different. You will need to designate several unique IP ranges to be used for SDDC infrastructure and workloads, ensure the proper firewall ports are allowed to manage your SDDC, and prepare your GCP environment before deploying an SDDC. All of these prerequisites are detailed in the GCVE prerequisites documentation, which I highly recommend reading. Google’s documentation is thorough, and there is nothing better than reading through all of the docs if you want to understand how this solution works. Here is an overview of the required steps:
- Plan the IP ranges you will use with GCVE. These are all RFC 1918 private addresses. You will need ranges for each of the following:
- vSphere and vSAN (/21 - /24 accepted). Depending on the size of the range you choose, it will be divided into additional subnets for management, vMotion, vSAN, and NSX. Details on the layout for these subnets are available here.
- HCX (/27 or higher)
- Edge Services, required for client VPN and internet access (/26)
- Client subnet, assigned to clients connecting via VPN Gateway (/24)
- Workload subnets, which will be configured in NSX-T after your SDDC is deployed. These are entirely up to you to determine, but my advice is to reserve plenty of IPs to use.
- Ensure your local firewall is configured for communication with vCenter and workload VMs. Ports used for communication are documented in the prerequisites.
- Enable the VMware Engine API in your Google Cloud Project
- Enable the VMware Engine node quota
Once these are completed, you are ready to create your SDDC!
Creating a GCVE SDDC
To create a GCVE SDDC, browse to Compute > VMware Engine in the GCP Console. This will bring you to the GCVE homepage.
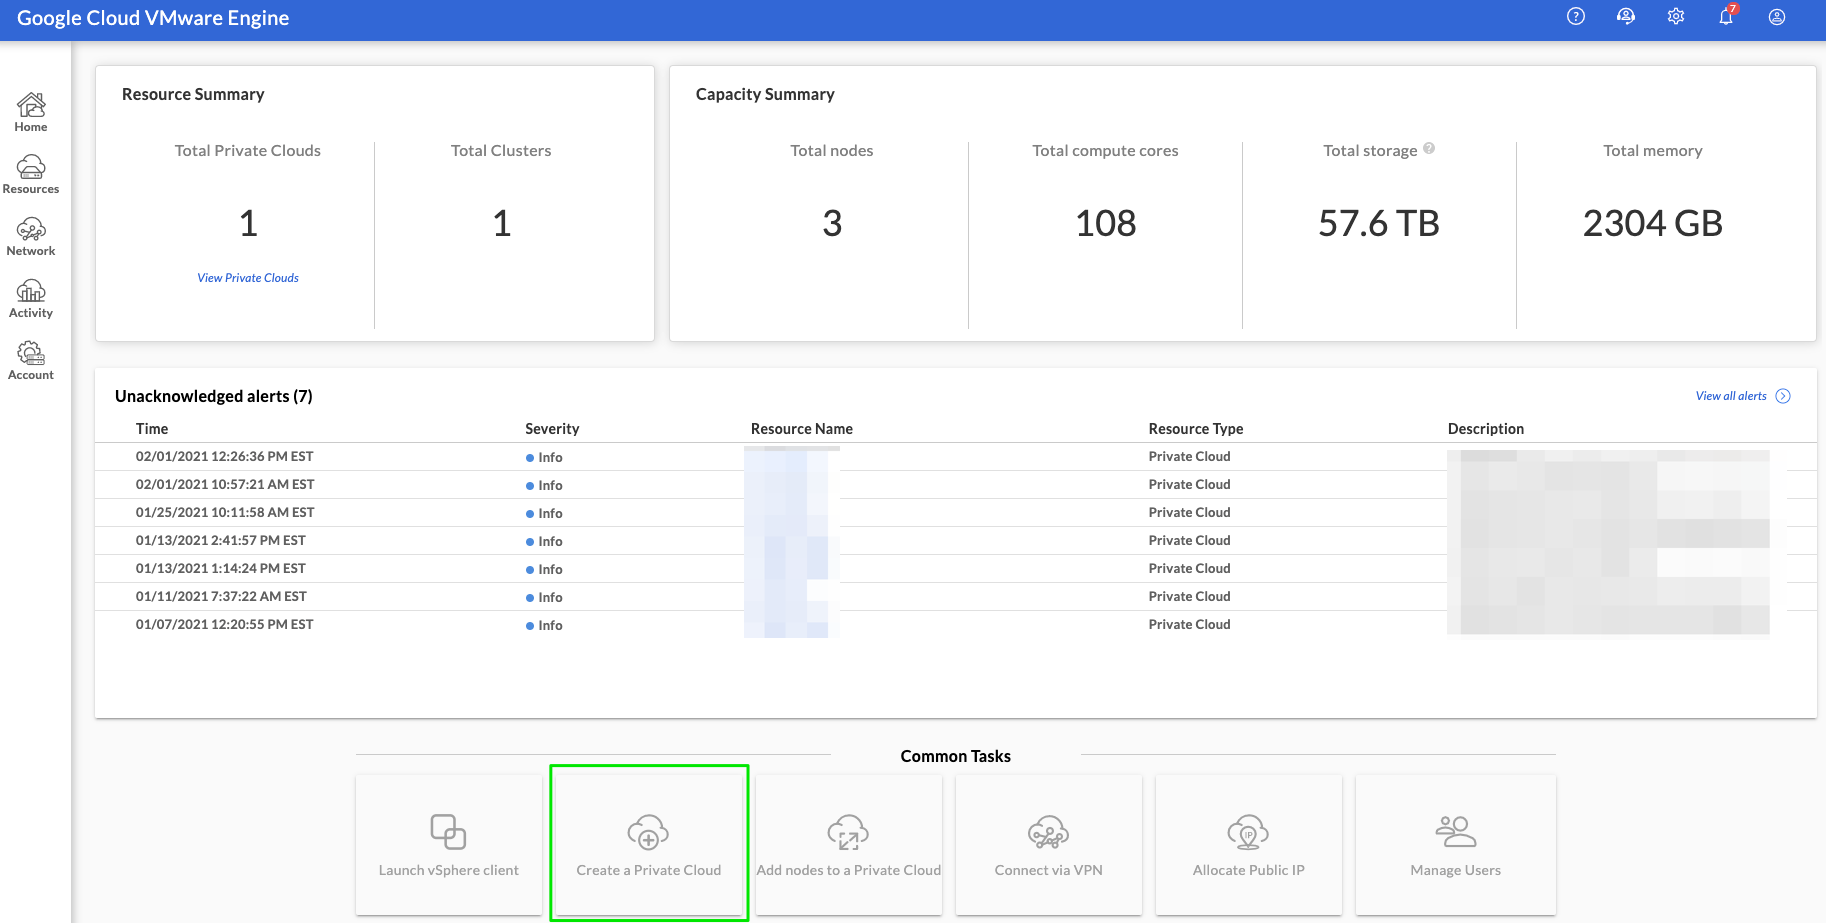
Click Create a Private Cloud to get started.
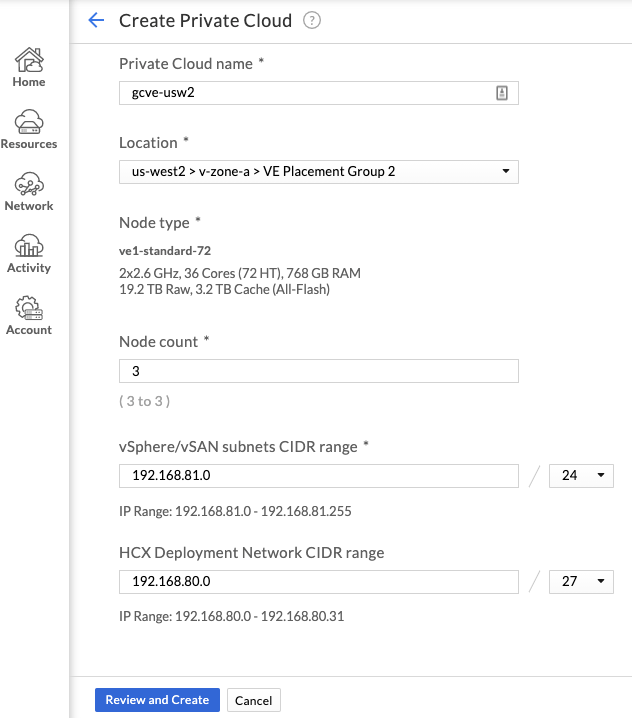
Specify your cloud name, location, node count, and predetermined network ranges. If you cannot choose your desired region, ensure you have requested VMware Engine nodes quota for that region. Your quota will also determine how many nodes you can request. The minimum node count is three nodes. After clicking Review and Create, you will be shown a confirmation page. Review your choices and click Create.
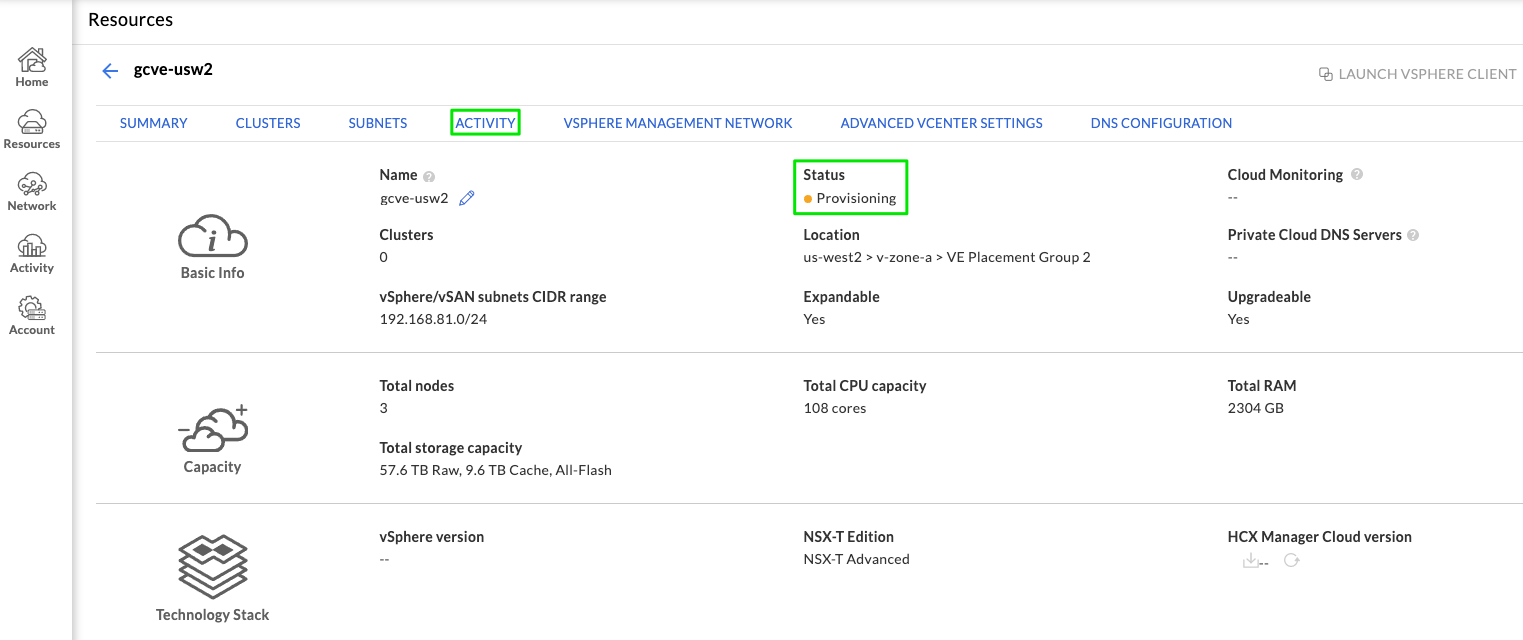
You will be taken to a summary page for your new cluster once provisioning begins. Note that the state is Provisioning in the screenshot above, and it will take between 30 minutes to 2 hours to complete. My experience has been that it takes just over 30 minutes to provision an SDDC, which is pretty impressive. You can click on the Activity to tab view recent events, tasks, and alerts. Drilling into those will provide specifics on any activity in your SDDC, including the provisioning process.
Setting Up the GCVE VPN Gateway
There are several ways to access your GCVE environment, including Cloud Interconnect and Cloud VPN. I will explore these topics in future posts. To establish initial connectivity to GCVE, a VPN gateway can be used. This is an OpenVPN-based client VPN that will allow you to connect to your SDDC’s vCenter and perform any initial configuration that you desire.
Before the VPN gateway can be deployed, you will need to configure the “Edge Services” range for the region where your SDDC is deployed. To do this, browse to Network > Regional settings in the GCVE portal, and click Add Region.
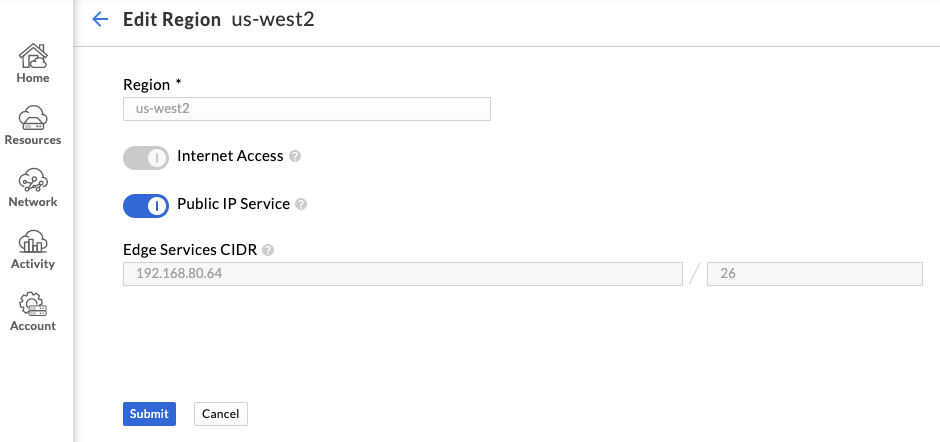
Choose the region where your SDDC is deployed and enable Internet Access and Public IP Service. Supply the Edge Services range you earmarked during planning and click Submit. Enabling these services will take 10-15 minutes. Once complete, they will show as Enabled on the Regional Settings page. Enabling these settings will allow Public IPs to be allocated to your SDDC, which is a requirement for deploying a VPN Gateway. To begin the deployment, browse to Network > VPN Gateways and click Create New VPN Gateway.
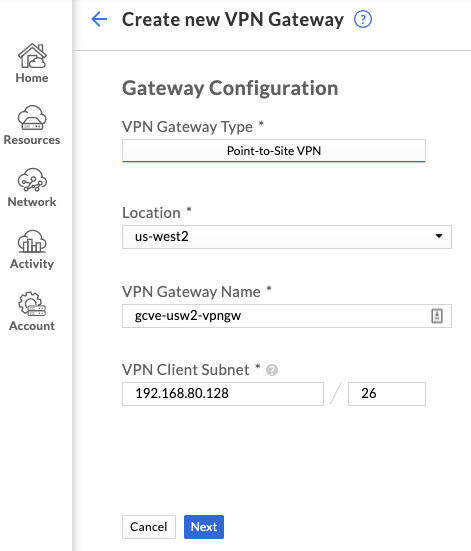
Supply the name for the VPN gateway and the client subnet reserved during planning and click Next.
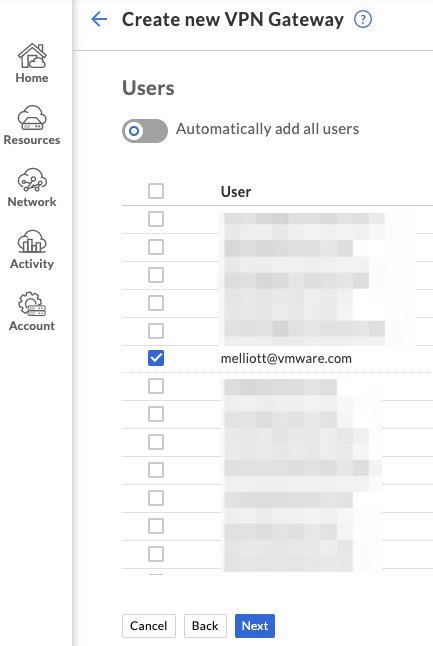
Choose specific users to grant VPN access, or enable Automatically add all users, and click Next.
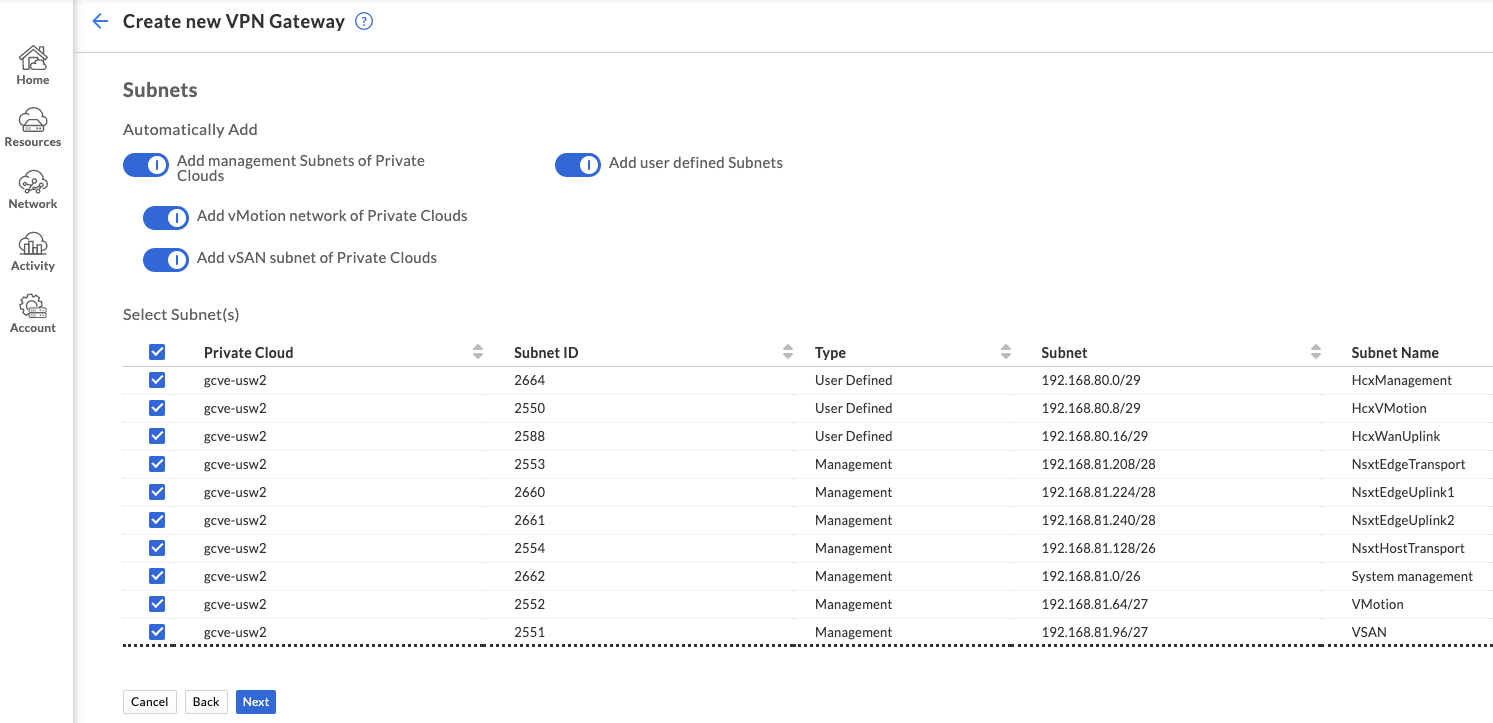
Next, specify which networks to make accessible over VPN. I opted to add all subnets automatically. Click Next, and a summary screen will be displayed. Verify your choice and click Submit to create the VPN Gateway.
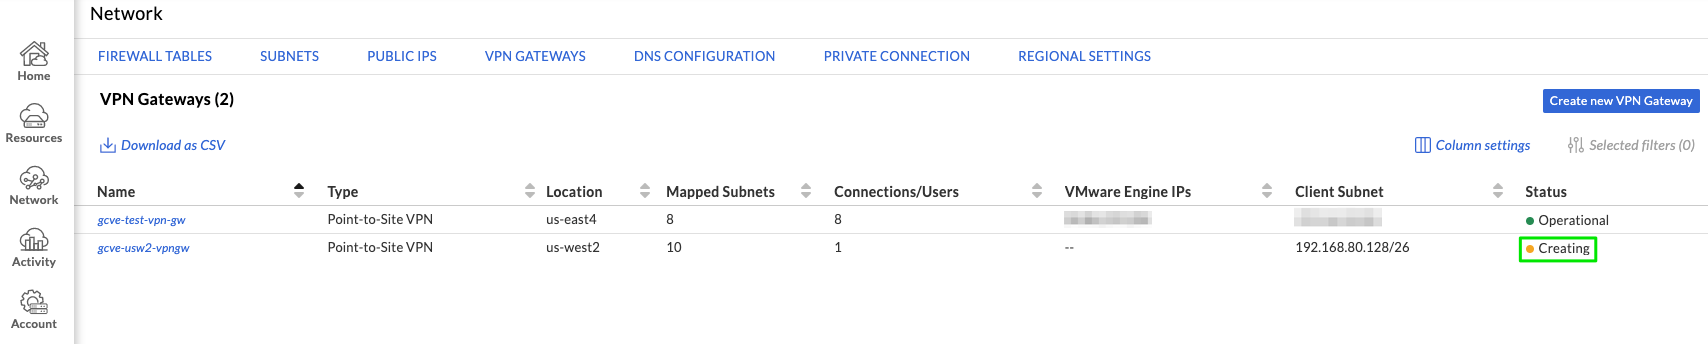
You will be returned to the VPN Gateways page, and the new VPN gateway will have a status of Creating. Once the status shows as Operational, click on the new VPN gateway.
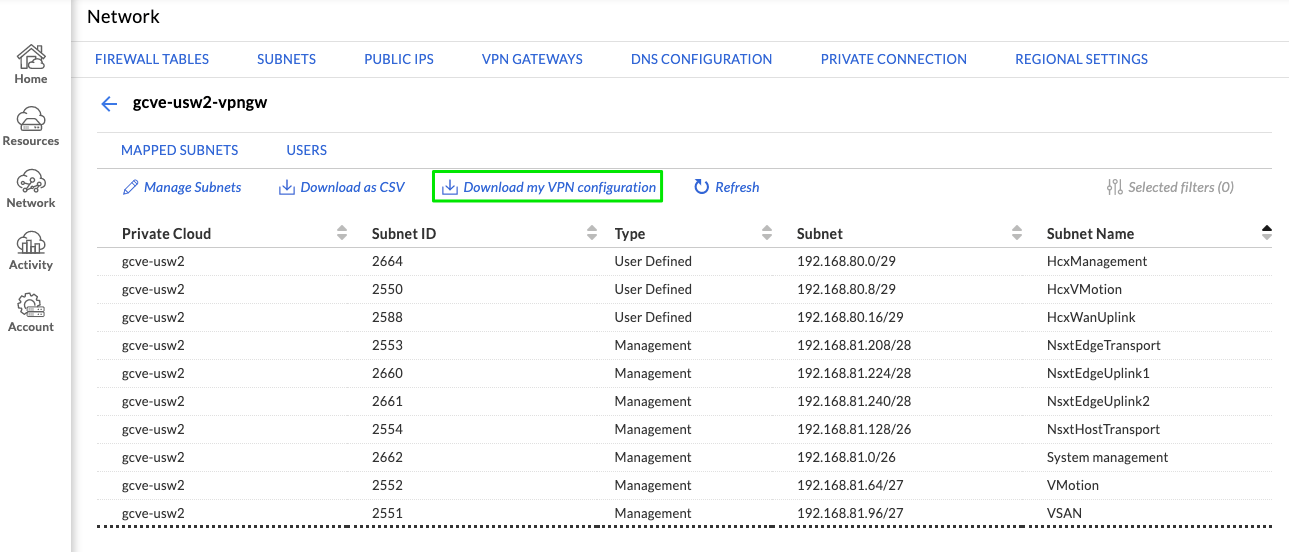
Click Download my VPN configuration to download a ZIP file containing pre-configured OpenVPN profiles for the VPN gateway. Profiles for connecting via UDP/1194 and TCP/443 are available. Choose whichever is your preference and import it into Open VPN, then connect. In the GCVE portal, browse to Resources and click on your SDDC.
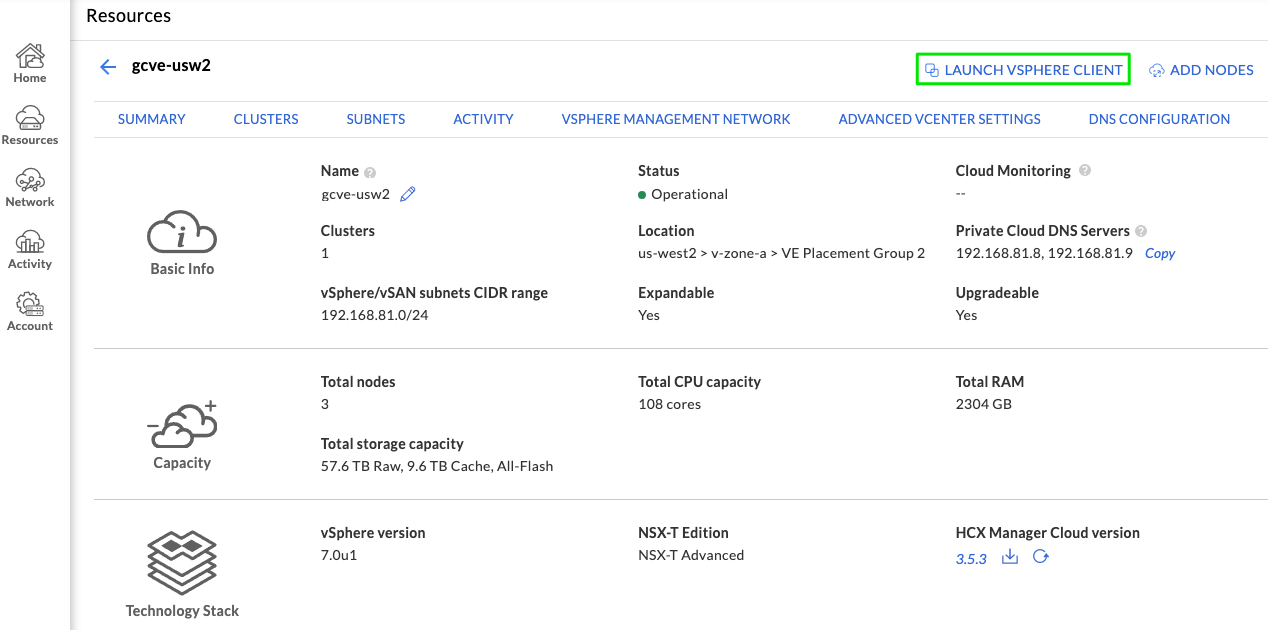
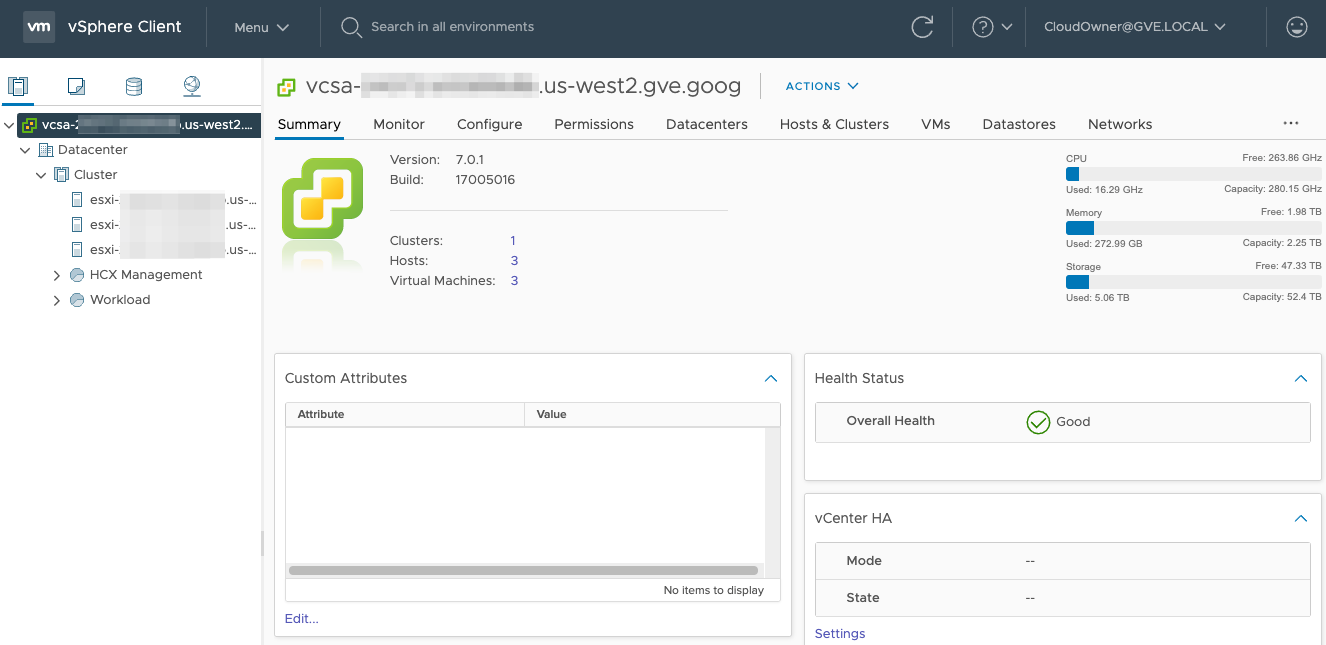
Finally, you can click Launch vSphere Client. Login with username [email protected] and password VMwareEngine123!. Huzzah! You are now free to explore your newly created SDDC in GCVE. Your first task should be updating the password for the [email protected] account.
Wrap Up
As you can see, deploying in SDDC in GCVE is easier than setting up client VPN access. Now, a standalone SDDC is cool, but in the next post we will look at connecting it to a VPC. This will be almost entirely automated with Terraform, apart from a tiny bit of work that needs to be done in the GCVE portal. Later posts will cover creating a bastion host, connecting with Cloud VPN and Cloud Interconnect, configuring HCX for workload migration, and all sorts of other use cases. Are you using GCVE? If so, please reach out to me on Twitter (@NetworkBrouhaha) and let me know what topics you’d like to see covered.